As the former head of marketing for two different tech startups, I learned firsthand that email newsletters can be an incredibly powerful tool in any marketer’s toolbox.
Plus, experts suggest that the ROI on email marketing may be as high as $40 for every dollar spent, and according to HubSpot’s global survey of marketing professionals, nearly 9 out of 10 marketers plan to continue or increase their investment into email marketing in 2024. So, how do you create an email newsletter?

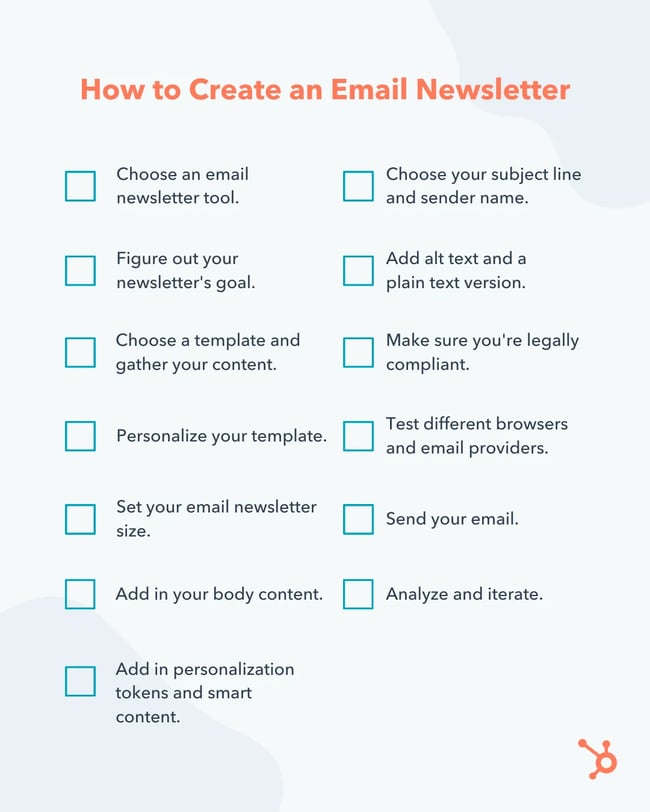
In this article, I’ve put together a comprehensive checklist to help you get started with your email newsletter strategy. Drawing on my own experience, as well as expert tips and the latest data-driven insights, you’ll find everything you need to know about drafting, perfecting, and sending your very own email newsletter.
- Step 1: Choose an email newsletter tool.
- Step 2: Figure out your newsletter’s goal.
- Step 3: Choose a template and gather your content.
- Step 4: Personalize your template.
- Step 5: Set your email newsletter size.
- Step 6: Add in your body content.
- Step 7: Add in personalization tokens and intelligent content.
- Step 8: Choose your subject line and sender name.
- Step 9: Support your newsletter content with alt text and plain text.
- Step 10: Make sure you’re legally compliant.
- Step 11: Test different browsers and email providers.
- Step 12: Send your email.
- Step 13: Analyze and iterate.
How to Start an Email Newsletter
Creating a great email newsletter is easier said than done. It’s not just about throwing together some content: You’ll have to proofread the copy, create compelling calls-to-action, design the email to work for multiple inboxes and devices, avoid spam triggers, brainstorm clickable subject lines, and so much more.
You’ll also have to make sure you stay within the confines of email law, and if you mess up any part of your email, there’s no undoing it once you send it to your subscribers — so the pressure’s on.
The good news is that if you follow the checklist below, you’ll be sure to remember all the steps involved in crafting a compelling, effective newsletter.
Ready to get started? Here’s everything you need to know to create an email newsletter that’s tailored to your business or personal goals.
Step 1. Choose an email newsletter tool.
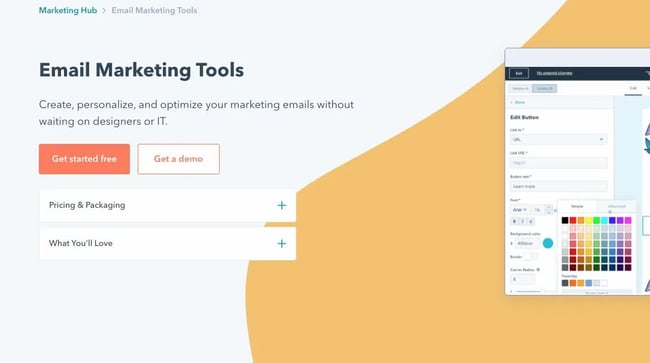
The first thing you’ll need to do is choose the best email newsletter tool for your budget, goals, and level of technical skills.
HubSpot offers one of the best email marketing tools you can use to send optimized, well-designed newsletters. It’s part of Marketing Hub, which is a collection of marketing automation software for small-to-enterprise businesses.
HubSpot’s newsletter tool also offers a number of integrations and alternative email newsletter design tools, such as Beefree. This tool is easy to learn, and best of all, you can start for free. Throughout the sections below, I’ve included screenshots from HubSpot’s email newsletter tool to illustrate each step in action.
Step 2. Figure out your newsletter’s goal.
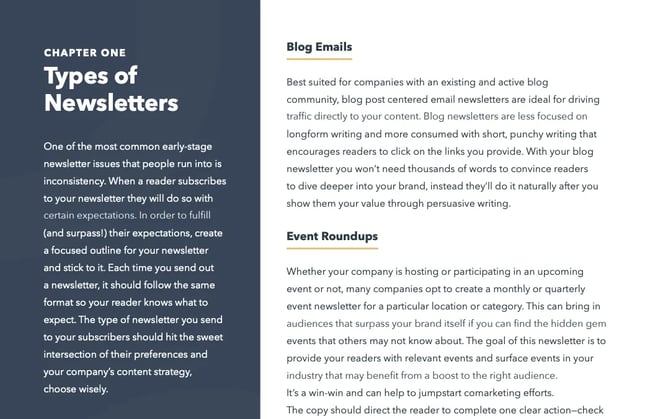 Learn the types of newsletters you can send in our free email newsletter guide.
Once you’ve selected an email newsletter tool, it’s time to think about your goals. Don’t jump straight into writing. Instead, it’s important to ensure you’re fully aware of why you’re investing in your newsletter at all and how it fits into your larger content strategy.
As marketing expert Ammar Mazhar explains, “With clear goals, it can be easier to determine the campaign’s effectiveness and make necessary adjustments to improve its performance.”
Mazhar continues, “Goals also help to align the email marketing efforts with the overall business objectives and ensure that the campaign is aligned with the company’s goals and target audience.”
Is your newsletter meant to drive more traffic to your blog? Help you generate leads? Get more email contacts? Send traffic to your website? Promote new products and services? It’s essential to start by figuring out your goal (or goals). Then, the rest of your decisions can be informed by those larger objectives.
You should also define some Key Performance Indicators, or KPIs, for each of your goals. It’s important to go beyond “how many people opened my email” and instead come up with KPIs that are closely tied to your overall business goals. To be sure, email open rates can be a great indicator of a newsletter’s performance — but they shouldn’t be the only number you track.
For example, one in three marketers report that click-through rate is one of the top two metrics they track when measuring the performance of an email campaign, while 31% list open rate as a top metric to track. If you’re not sure where to start, here are some more email marketing metrics that may be worth considering.
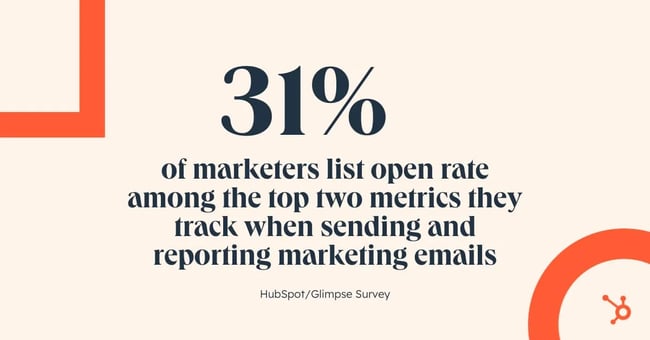
Image Source
Step 3. Choose a template and gather your content.
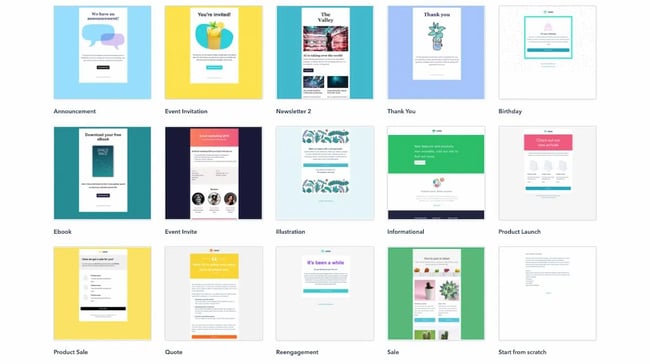
Now, after you’ve settled on your newsletter’s goals, you can choose a template and start finding content for it.
If you haven’t designed your own emails before, I’d recommend looking into pre-made templates — while they’re not required, these templates can save you a lot of trouble down the line. And if you’re using HubSpot, you can easily access pre-made templates right in the email tool.
Of course, once you’ve got a template, you’ll need to come up with some content. In general, there are two approaches to content creation: active and passive.
If you take an active approach, that means you’ll actively hunt for content that will meet your specific goals. In contrast, if you take a passive approach, that means you’ll just wait until you randomly stumble across content that could fit nicely for your newsletter.
Personally, I tend to do a lot of active searching for content, as I’ve found that this can be a great way to source the best ideas to meet my exact needs. That said, a more passive approach can save a lot of time. So, depending on how often you plan to send your newsletter, you can determine whether you’ll need to actively search for content, or will be able to rely on passively finding content in the time between when each email is sent.
For example, if you only intend to send a newsletter once per month, bookmarking relevant links throughout the month can be a good option. That way, once it’s time to come up with content, you can just go back through your bookmarks, rather than having to start hunting for content from scratch.
At the end of the day, how you prefer to gather content is up to you. But if you’re not sure where to start, I always recommend sifting through places such as your company’s blog, social media accounts, lead-generation offers, internal newsletters, and training documents for inspiration.
Featured Resource: Email Newsletter Lookbook
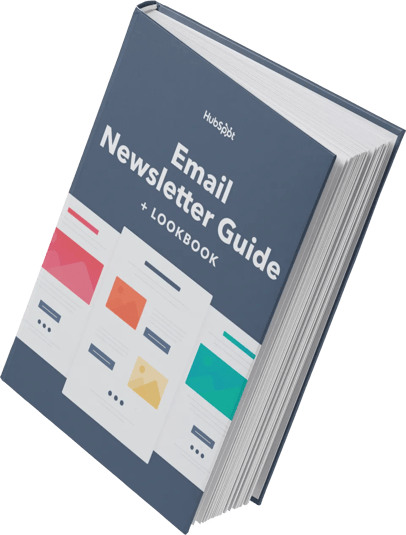 Need some inspiration for the content you can include in your newsletter? HubSpot’s Email Newsletter Lookbook highlights some of the best email newsletters across industries to help you plan out your email newsletter.
Step 4. Personalize your template.
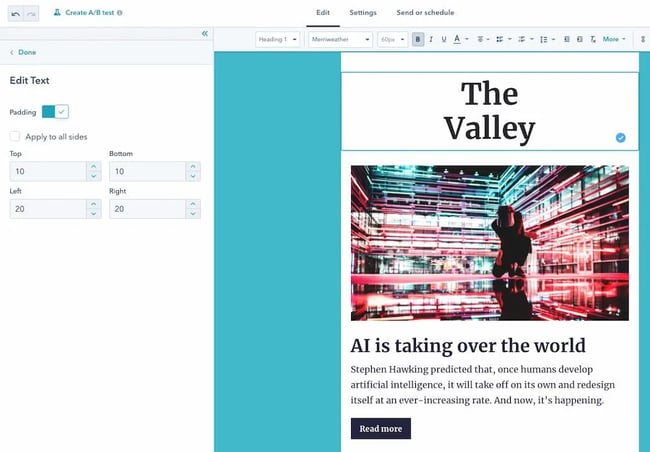
A template is an important starting point — but if you want to create a great newsletter, some personalization is essential. In HubSpot’s Marketing Hub, you can adjust your template by clicking on elements and editing the specifications on the left-hand panel.
Of course, personalization doesn’t mean that your template should be flashy. Even newsletters with minimal text and color formatting can perform really well. Rather than adding lots of unnecessary custom features, the best designs make it easy for recipients to scan the email and click on interactive elements.
Pro tip: I like to use HubSpot’s AI Email Writer to help me design newsletters. This tool can generate a first draft of your copy, and you can then select a template that suits your needs.
Another key component of an email newsletter template is mobile responsiveness. Research shows that 41.9% of email views occur on mobile phones, making mobile-friendly email design a non-negotiable. So, as you personalize your template, make sure that it looks good, no matter the screen size.
Step 5. Set your email newsletter size.
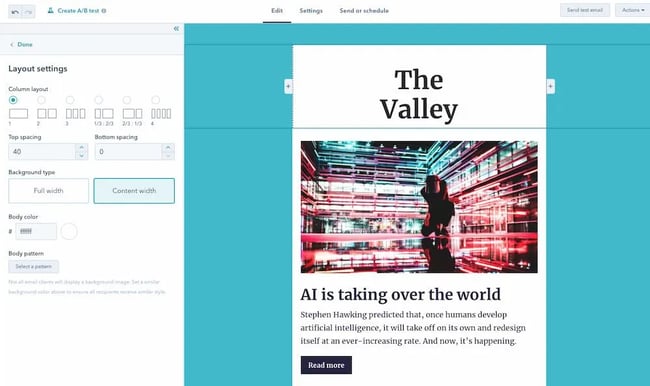
When you send a regular email, you don’t usually have to worry about its size. But when it comes to email newsletters, it’s important to make sure you’ve optimized factors like the height, width, and resolution of your email.
This is especially complicated when you consider that different subscribers will likely open your email on different devices and through email clients. Given this variance, how are you supposed to know what size or resolution your email should be?
Most providers will default to a newsletter size of 600 pixels wide, with another 30 pixels of body padding on all sides. Unfortunately, when this adjustment happens, the content inside your newsletter might not look very good. As such, it’s essential to ensure that your newsletter design fits inside that standard 600-pixel width.
Email height (or rather, length) is a little more flexible: Ultimately, your email can be as long as you want it to be, and email clients are unlikely to distort its design.
That said, if your email goes on forever, people are much less likely to click through to your website or other CTAs. Moreover, email clients with sensitive spam filters might flag your email as spam if it’s excessively lengthy. If you’re not sure how long is too long, a rule of thumb I’ve found helpful is to try to make sure it doesn’t take your recipients more than a second to scroll through to the end of your email.
Step 6. Add in your body content.
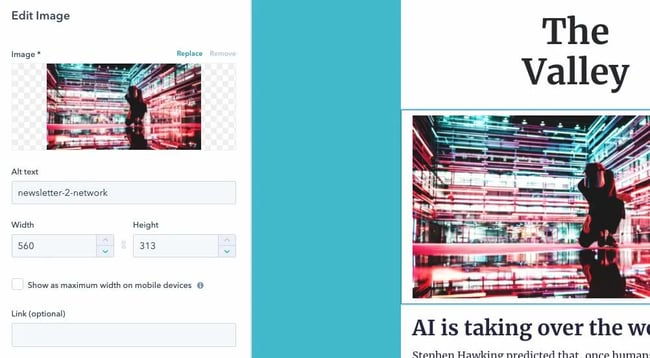
So, you’ve got an email template, and you’ve made sure it’s a good size. Now it’s time for the fun part: filling in your template with words and pictures. This will be the meat of your email newsletter, so it’s worth spending the time to perfect it.
Ben Berkley, managing editor for The Hustle, says it should be clear to your audience what kind of value to expect from the newsletter but ensure the content isn’t predictable. This way, readers never know what they’ll get, but “they know it’ll be worth their while to read through it.”
If you’re not sure where to start, this comprehensive guide offers some helpful tips and tricks for crafting email newsletter copy. I also love the email newsletter examples in this article, which you can look through for inspiration.
But in general, I’ve found that keeping the copy short and sweet is an effective way to encourage click-throughs (though there are certainly plenty of exceptions). In addition, including plenty of imagery can help support your copy and engage your readers. You can also consider leveraging generative AI tools like ChatGPT to help you craft a first draft. In fact, HubSpot’s recent survey of marketing professionals found that 32% of global marketers believe that generative AI is helpful for writing copy for emails.
Most importantly, don’t forget to edit your email content thoroughly. You might even want to share it with a teammate for a once-over, to get a fresh set of eyes and catch any errors you may have missed. After all, once the email is sent, you can’t fix those embarrassing typos — so it’s definitely worth double-checking everything before clicking send.
Step 7. Add in personalization tokens and intelligent content.
When I get an email newsletter that feels like it’s been written just for me, I open it, click on all the links, and share it with my friends. When it feels like a trusted friend or mentor took the time to put together a thoughtful piece of content with just the things I’m interested in, it’s a recipe for engagement.
As senior content writer Rebecca Riserbato explains, “One of the main benefits of email marketing is that your content can be highly personalized to your audience’s needs. Your emails might have variations, including different images or subject lines to increase your engagement. You can even create segmented lists based on geography or engagement levels.”
So, what does it take to craft a newsletter that feels truly personal? Here are three of my favorite strategies.
1. Segment your emails.
The first strategy is to segment your emails into multiple groups. This will enable you to choose content that’s specific to each audience, rather than sending everyone the same thing.
As digital marketing expert Maggie Douglas describes in her comprehensive review of email segmentation, “If you get your email marketing segments right, your customers will receive relevant emails packed with information that they actually want. That personalization leads to more conversions, more purchases, and happier customers.”
2. Use personalization tokens.
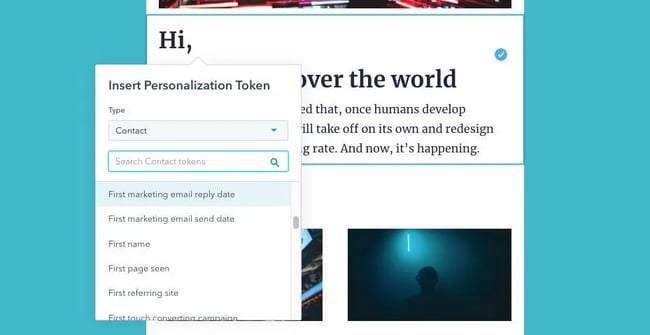
Next, use personalization tokens to greet individual recipients by name, congratulate them on an anniversary or birthday, or reference particular topics you know they’re most interested in.
If your marketing software supports personalization tokens, this is generally fairly straightforward to implement — and it can significantly improve your conversion rates. In HubSpot’s Marketing Hub, you can add personalization tokens by simply clicking “Personalize” in the top navigation bar.
Pro tip: I don’t like to use too many personalization tokens. It’s all about balance: A bit of custom content is good, but you don’t want to creep out your recipients.
3. Leverage smart content.
Finally, leveraging smart content is another great way to personalize your emails. Smart content makes it possible to show one piece of content to one segment of your audience, while showing other pieces of content to other audiences.
For example, a smart CTA could enable prospective customers to see a CTA for talking to a sales rep, while existing customers could see a CTA to get tickets for a customer-only event. Neither audience would want to see the other audience’s CTA, and with smart content like this, you can show each person only the CTA that’s relevant to their needs.
Step 8. Choose your subject line and sender name.
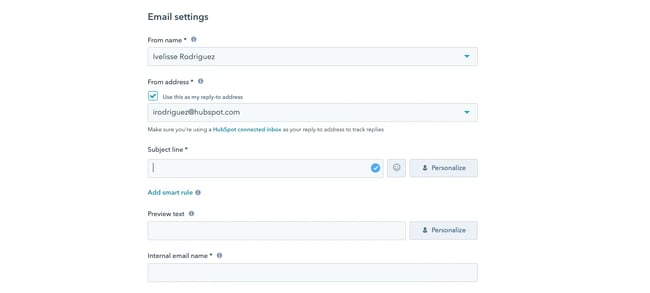
Most of us tend to focus on the body of an email itself — but the subject line and sender are just as important. I’ve even found that sometimes, those two key items are even more critical than what’s in the email body, since they’re what determine whether a recipient will click to open the email at all.
In fact, one recent report found that 70% of email recipients will report emails as spam based purely on an email’s subject line. The report also found that subject lines that include the recipient’s name are 18.3% more likely to be opened, further highlighting the importance of a clear, personalized subject line.
As far as the sender, there are a range of approaches to consider. Some marketers like to stick to their company name, while others prefer to use their own name. Whatever you choose, make sure it’s easily recognizable, so your recipients aren’t confused about who you are and why they’re getting your email.
Subject lines are a little trickier. Brevity is generally important, and an immediately actionable value proposition can also make a subject line more click-worthy.
But sometimes, a surprising or unusual subject line can also be a great way to catch people’s attention: For example, a subject line that just reads “Not Cool, Guys” can be very effective in driving clicks.
This article offers over a hundred subject line examples you can use for inspiration, but at the end of the day, these are all just a jumping-off point for your own creativity. So start with these ideas and best practices, but then run A/B tests to see what resonates the most with your unique audience.
Step 9. Support your newsletter content with alt text and plain text.
At this point, you might be thinking you’re ready to go. You’ve got your email content, it’s nicely designed and personalized, and you’ve chosen a subject line and sender that are bound to catch your recipients’ attention.
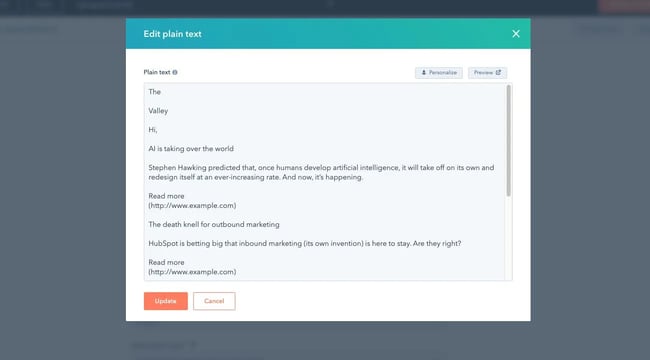
But remember: There’s more to an email than what most of us see. Specifically, including a plain text version as well as alt text for any images is critical to ensure your email is accessible to all readers.
Alt text is the text that appears when a picture fails to load properly, and it’s also the text that is read aloud for users who rely on a screen reader.
Since some of your users may use screen readers, and since not all email providers load images correctly, it’s vital to ensure you’ve included clear, useful alt text. That way, even if recipients can’t see the images, they’ll be able to follow the email content.
This is especially important if your email includes image CTAs. After all, if you’re relying on an image to drive clicks, your conversion rates will suffer without alt text.
In addition, some email clients are unable to display HTML design elements correctly. To ensure users with these clients can still read your email, you’ll need to create emails that look great in plain text, too. That means checking to make sure links are easy to click, and that it’s clear what your email is about even without photos and formatting.
Step 10. Make sure you’re legally compliant.
Alongside marketing considerations, it’s also important to make sure that your emails are compliant with any relevant laws and regulations. For most organizations, the two most significant laws that marketers need to worry about are CAN-SPAM and GDPR.
- CAN-SPAM is a United States law that requires marketers to include a footer in their email newsletter with their organization’s mailing address and an easy way to unsubscribe from future marketing emails.
- GDPR is a similar but more comprehensive European privacy law that requires (among other things) that marketers only send email newsletters to people who have explicitly opted in to receiving them. In other words, wherever you collect email addresses on your website, you cannot automatically check the “opt-in” box for users who live in Europe — they must deliberately check this box themselves.
As Denys Kontorskyy, technical content writer for email delivery platform Mailtrap, explains, “Just like with any law, you face a penalty when [email marketing regulations are] not followed. In this case, it’s usually in the form of a hefty fine.”
On top of that, Kontorskyy says, you’ll end up on various blocklists that will damage your reputation with email service providers and customers. “So before you send anything to the people from your email list, it’s important to understand what can be included and not in your emails,” Kontorskyy says.
Step 11. Test different browsers and email providers.
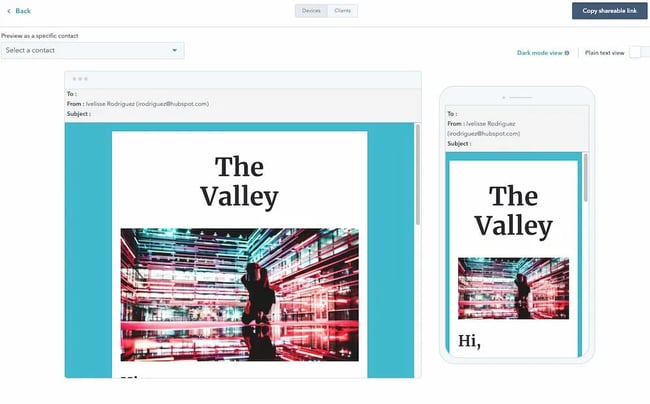
Email providers don’t all read email code the same way. That means that an email that looks fine in Gmail in Chrome might look terrible in Outlook, for example. As such, I always recommend testing emails in all the most popular browsers and email providers.
If you have HubSpot, you can test your emails for different providers directly in the email newsletter tool. Alternatively, you can create email accounts for yourself on various providers’ websites and install different web browsers, and then test each one manually.
Step 12. Send your email.
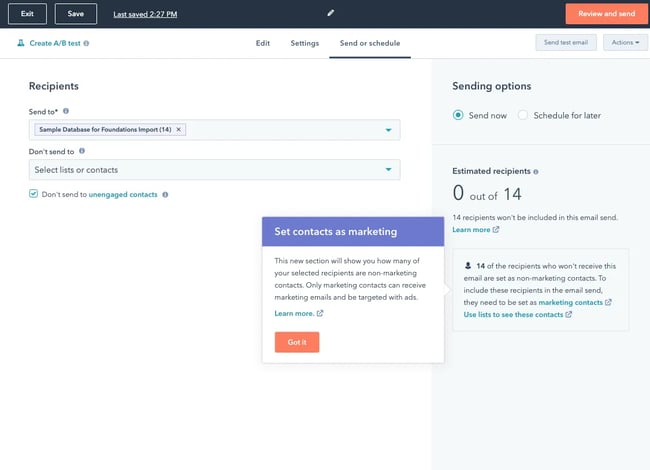
The moment of truth! Ensuring all your email recipients have subscribed to receive this email and your email has all the branding and legal compliance it‘s worthy of, it’s time to click send. Then, wait for the data to roll in.
Step 13. Analyze and iterate.
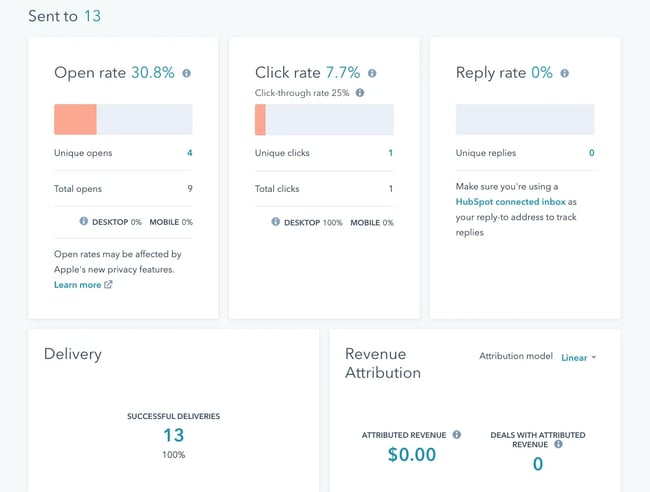
Fast-forward a few days. How did your newsletter perform? And what should you do next?
To start answering these questions, step one is checking how your email performed on the goals you outlined at the outset. Use a tracking tool to see which links in your email got the most clicks and which design elements likely contributed most to your goals.
Once you have that data, you can use it to inform how you put together your next email newsletter. Whether your next send is in a day, a week, a month, or a quarter, you can use these data-driven insights to make each newsletter better than the last.
Start Creating Your Email Newsletter
Email newsletters are a critical part of any scalable email marketing strategy. In fact, HubSpot’s 2024 State of Marketing Report found that one in three companies currently leverage email marketing as an important part of their overall strategy.
With all the steps I’ve shared above, you are well on your way to creating a winning email newsletter strategy that ultimately helps you convert more leads and grow your business.
Editor’s note: This post was originally published in March 2014 and has been updated for comprehensiveness.
![How to Create an Email Newsletter [+ Expert Tips & Checklist]](http://blog.contentkrush.com/wp-content/uploads/2021/06/cropped-ck1.png)

![How to Create an Email Newsletter [+ Expert Tips & Checklist] How to Create an Email Newsletter [+ Expert Tips & Checklist]](https://accesspressthemes.com/import/vmagazine/wp-content/uploads/2018/05/u7-adss.jpg)


Comment here